> For the complete documentation index, see [llms.txt](https://ideogram.gitbook.io/docs/llms.txt). Markdown versions of documentation pages are available by appending `.md` to page URLs; this page is available as [Markdown](https://ideogram.gitbook.io/docs/edit/upscale.md).

# Upscale

Enlarge an image with the Upscale app, Studio or Upscale & download. Understand 2x/4x/8x sizes, resolution limits, model controls and unavailable scales.

Upscaling makes an image larger and adds detail so it stays sharp. Use it to get a high-resolution file for printing posters, wall art, t-shirts and other print-on-demand products, or to enlarge a small or blurry photo. You can do it in three places:

| Where                                          | Sizes                                          | Best when                                           |
| ---------------------------------------------- | ---------------------------------------------- | --------------------------------------------------- |
| [Upscale app](#the-upscale-app)                | 2x, 4x or 8x, or 1K/2K/4K with Nano Banana Pro | You want to choose the upscaler and its settings    |
| [Studio layer](#upscale-a-layer-in-studio)     | 2x, 4x or Ultra 8x                             | You are editing in Studio and need one layer larger |
| [Upscale & download](#upscale-as-you-download) | 1K, 2K, 4K or 8K                               | You just want a bigger file                         |

The Upscale app needs a paid plan or bought credits. The other two need a paid plan. Without a plan, [buy credits](/docs/plans-and-billing/buying-extra-credits.md) and use the Upscale app.

The app's **Scale** multiplies each side: a 1,024-pixel-wide image at **4x** comes out 4,096 pixels wide, about 4K. The download menu names sizes by result (**4K**) instead. The scale limit is based on the output's total pixel count, up to the equivalent of an 8192×8192 image. Large source images may therefore offer fewer scales.

## The Upscale app

### Open it

* On an image page, click **Upscale**. The app opens with the image loaded.
* Open an image's **…** menu in the Library's **Generations** or **Uploads** tab, or an app's **Assets** tab, and choose **Upscale** under **Use**.
* Open **Apps** and search for Upscale. Under **Source image**, click **+ Add** to upload an image or choose one you already have.

### Steps

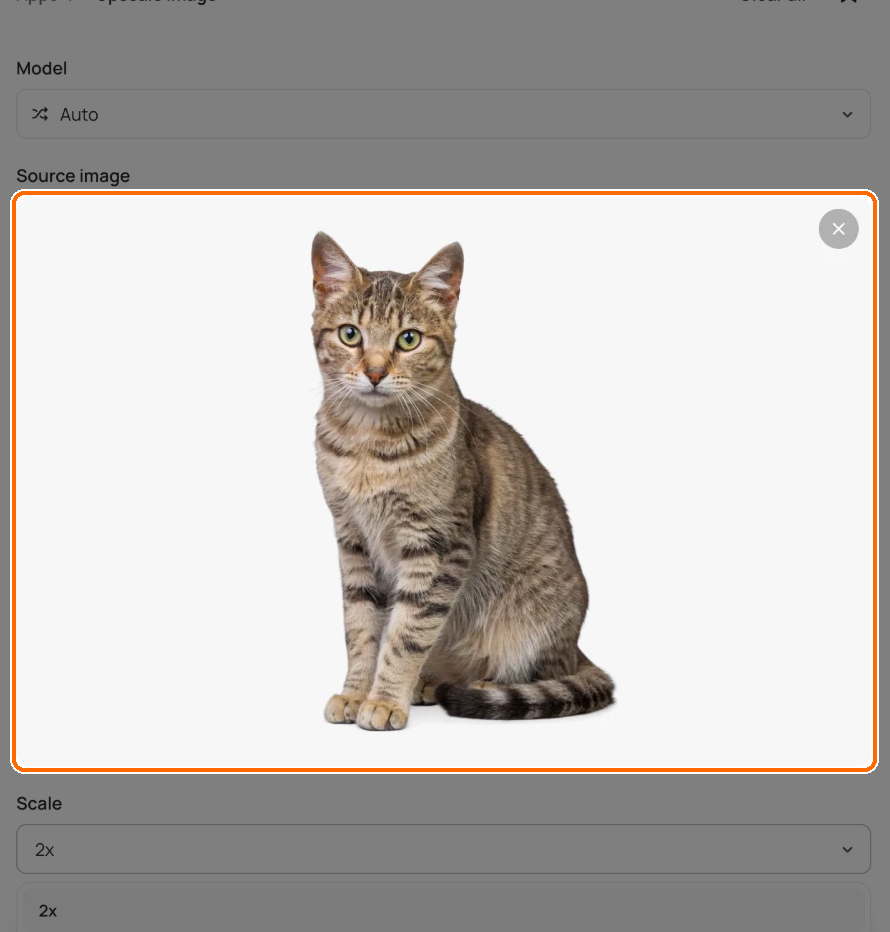
1. Check the **Source image**. If the box is empty, click **+ Add**.

   <figure><img src="https://1799634369-files.gitbook.io/~/files/v0/b/gitbook-x-prod.appspot.com/o/spaces%2FzjhNby3LLsIikYuvxAJP%2Fuploads%2Fgit-blob-61bbab3ecffd7bab9dc0cda03fe050fbd1faa4c8%2Fupscale-1.png?alt=media" alt="Upscale app with a cat photo in the highlighted Source image box."><figcaption><p>Make sure this is the image you want bigger.</p></figcaption></figure>
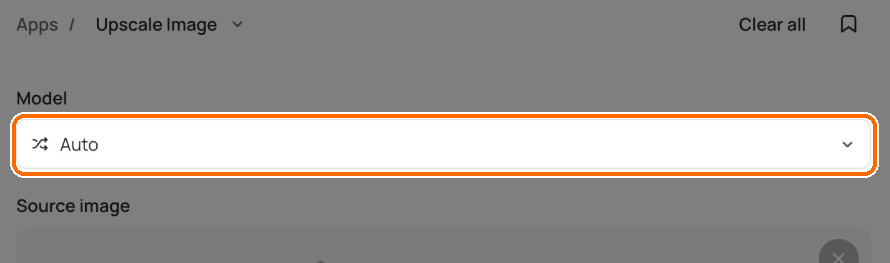
2. Pick an upscaler in the model picker, or leave it on **Auto**.

   <figure><img src="https://1799634369-files.gitbook.io/~/files/v0/b/gitbook-x-prod.appspot.com/o/spaces%2FzjhNby3LLsIikYuvxAJP%2Fuploads%2Fgit-blob-9b4ce1c7785123180dd8f74ea11b07da14db5058%2Fupscale-2.png?alt=media" alt="Upscale Model picker, highlighted, set to Auto."><figcaption><p>Leave <strong>Model</strong> on <strong>Auto</strong>, or pick an upscaler.</p></figcaption></figure>
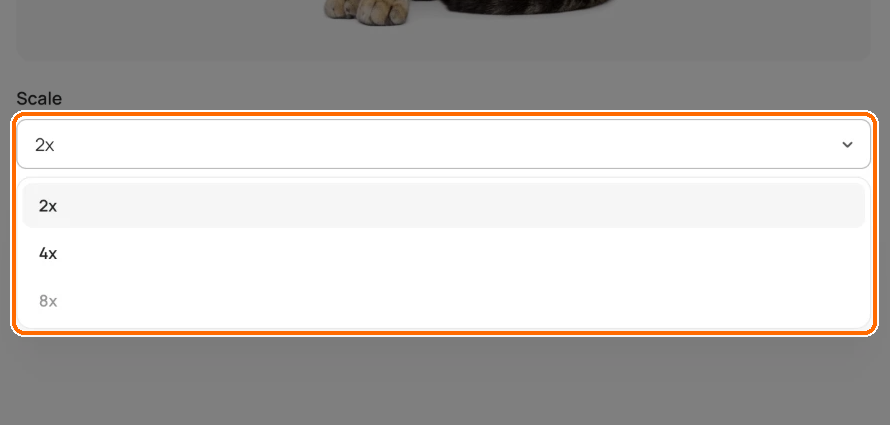
3. Set **Scale** to **2x**, **4x** or **8x** (default 2x).

   <figure><img src="https://1799634369-files.gitbook.io/~/files/v0/b/gitbook-x-prod.appspot.com/o/spaces%2FzjhNby3LLsIikYuvxAJP%2Fuploads%2Fgit-blob-d75ac2bbe73291ef2f4dbf9c13ab5fad45b4e170%2Fupscale-3.png?alt=media" alt="Scale menu open and highlighted, listing 2x and 4x, with 8x greyed out."><figcaption><p>Pick a size. Sizes too big for this image are greyed out.</p></figcaption></figure>
4. Click **Upscale**. The button shows the cost first. See [how credits work](/docs/plans-and-billing/available-plans.md#how-credits-work).

   <figure><img src="https://1799634369-files.gitbook.io/~/files/v0/b/gitbook-x-prod.appspot.com/o/spaces%2FzjhNby3LLsIikYuvxAJP%2Fuploads%2Fgit-blob-e32a38078f4642b50dbb07ed8cbdfcda83fdcb56%2Fupscale-4.png?alt=media" alt="Upscale button, highlighted, showing a cost of 50.33 credits."><figcaption><p>The button shows the cost before you click.</p></figcaption></figure>

Scales that exceed the supported output pixel count are greyed out in **Scale**. Under the menu you'll see "Up to Nx for this image." If even 2x is too big, the app tells you the image can't be upscaled.

### Upscalers

With **Auto**, Ideogram picks the upscaler and you only see **Source image** and **Scale**. Pick a named upscaler when you want more control. The list today:

* Topaz Bloom 2
* Topaz Standard 2
* Topaz Redefine
* Topaz Text Refine
* Topaz Wonder 3.5
* Nano Banana Pro

Each adds its own settings:

| Upscaler                               | Extra settings                                                                                                                                                               |
| -------------------------------------- | ---------------------------------------------------------------------------------------------------------------------------------------------------------------------------- |
| Topaz Bloom 2                          | **Creativity** ("Low stays faithful; high invents detail."), **Prompt**, **Keep colors**                                                                                     |
| Topaz Redefine                         | **Creativity** (1 to 9), **Prompt**, **Auto prompt**, **Texture** (1 to 5), **Detail pass** with **Detail strength**, plus face, sharpen and denoise controls                |
| Topaz Standard 2 and Topaz Text Refine | **Strength** (Auto lets Topaz judge each image), face enhancement, **Sharpen**, **Denoise**, **Fix compression** ("Removes JPEG blockiness and banding."), subject detection |
| Topaz Wonder 3.5                       | **Enhancement strength**: Low, Medium or High                                                                                                                                |
| Nano Banana Pro                        | **Resolution** 1K, 2K or 4K in place of **Scale**, and a **Prompt**. Only sizes larger than your image can be picked.                                                        |

To keep text in an image crisp, try Topaz Text Refine. To have the upscaler invent fine detail, raise **Creativity** on Topaz Bloom 2 or Topaz Redefine.

### Compare the upscalers

Each upscaler suits a different kind of image. We ran the same 1080 × 1080 ad through each Topaz upscaler at **2x** with default settings. The close-ups below show the bottle label, which has large and small lettering, ice and water droplets. Results vary from run to run, so treat these as a guide.

<div><figure><img src="https://1799634369-files.gitbook.io/~/files/v0/b/gitbook-x-prod.appspot.com/o/spaces%2FzjhNby3LLsIikYuvxAJP%2Fuploads%2Fgit-blob-c6cad12531f4c3fbd42e356f0c074efb11f1fee1%2Fupscale-compare-original.jpg?alt=media" alt="Close-up of a cold brew bottle label reading North Pour, Cold Brew, 12 fl oz, enlarged without upscaling and slightly soft"><figcaption><p>The original, enlarged 2x without an upscaler, for reference.</p></figcaption></figure> <figure><img src="https://1799634369-files.gitbook.io/~/files/v0/b/gitbook-x-prod.appspot.com/o/spaces%2FzjhNby3LLsIikYuvxAJP%2Fuploads%2Fgit-blob-5dc448604b152800b27e1acfe6b8e33cbf3a518a%2Fupscale-compare-text-refine.jpg?alt=media" alt="The same label after Topaz Text Refine, with sharp large and small lettering"><figcaption><p><strong>Topaz Text Refine</strong> keeps lettering sharp and true to the original. Use it for ads, posters, labels and packaging.</p></figcaption></figure></div>

<div><figure><img src="https://1799634369-files.gitbook.io/~/files/v0/b/gitbook-x-prod.appspot.com/o/spaces%2FzjhNby3LLsIikYuvxAJP%2Fuploads%2Fgit-blob-bac85754784f55a36ccf48b87e44f092f448722e%2Fupscale-compare-standard.jpg?alt=media" alt="The same label after Topaz Standard 2, sharper overall and close to the original"><figcaption><p><strong>Topaz Standard 2</strong> sharpens the whole image and stays close to the original. A good default for photos.</p></figcaption></figure> <figure><img src="https://1799634369-files.gitbook.io/~/files/v0/b/gitbook-x-prod.appspot.com/o/spaces%2FzjhNby3LLsIikYuvxAJP%2Fuploads%2Fgit-blob-5bbb1967618a294d90d4b18d247f97e4ec24da9e%2Fupscale-compare-wonder.jpg?alt=media" alt="The same label after Topaz Wonder 3.5, with crisp lettering and clearer droplets on the glass"><figcaption><p><strong>Topaz Wonder 3.5</strong> adds crisp texture to surfaces such as glass and ice.</p></figcaption></figure></div>

<div><figure><img src="https://1799634369-files.gitbook.io/~/files/v0/b/gitbook-x-prod.appspot.com/o/spaces%2FzjhNby3LLsIikYuvxAJP%2Fuploads%2Fgit-blob-2011e3898baf5f6d7c8cdd2eb179772eb40fcf88%2Fupscale-compare-bloom.jpg?alt=media" alt="The same label after Topaz Bloom 2, with added detail in the ice and droplets"><figcaption><p><strong>Topaz Bloom 2</strong> adds new fine detail, such as extra droplets and texture. Good for product shots and art.</p></figcaption></figure> <figure><img src="https://1799634369-files.gitbook.io/~/files/v0/b/gitbook-x-prod.appspot.com/o/spaces%2FzjhNby3LLsIikYuvxAJP%2Fuploads%2Fgit-blob-295f34fcbb78f832e599e64a2ffed6e7fa315cdd%2Fupscale-compare-redefine.jpg?alt=media" alt="The same label after Topaz Redefine, redrawn with a smoother, more painted look"><figcaption><p><strong>Topaz Redefine</strong> redraws the image the most. Good for soft, small or low-quality images that need new detail.</p></figcaption></figure></div>

Creative upscalers can redraw small lettering, such as the fine print on a label. When exact words matter, use Topaz Text Refine or Topaz Standard 2, or lower **Creativity**, and check the text before you use the file.

Redefine also redraws areas that are out of focus. Here, Standard 2 keeps the soft background leaves soft, while Redefine draws them sharper:

<div><figure><img src="https://1799634369-files.gitbook.io/~/files/v0/b/gitbook-x-prod.appspot.com/o/spaces%2FzjhNby3LLsIikYuvxAJP%2Fuploads%2Fgit-blob-5f38919468de5d02b1ad144b3e9736636abe974a%2Fupscale-compare-leaf-standard.jpg?alt=media" alt="Out-of-focus eucalyptus leaves after Topaz Standard 2, still soft like the original"><figcaption><p><strong>Topaz Standard 2</strong>: the leaves stay out of focus, as in the original.</p></figcaption></figure> <figure><img src="https://1799634369-files.gitbook.io/~/files/v0/b/gitbook-x-prod.appspot.com/o/spaces%2FzjhNby3LLsIikYuvxAJP%2Fuploads%2Fgit-blob-0485998b0bc0aa4a426220c15f20fe753e139c98%2Fupscale-compare-leaf-redefine.jpg?alt=media" alt="The same leaves after Topaz Redefine, with a sharper stem and leaf edges"><figcaption><p><strong>Topaz Redefine</strong>: the stem and leaf edges come out sharper.</p></figcaption></figure></div>

### Choose a scale without changing the shape

**2x**, **4x** and **8x** multiply both width and height. For example, a 1,024 × 768 image becomes 4,096 × 3,072 at **4x**; it keeps the same 4:3 shape. It has 16 times as many pixels, not four times as many. Upscaling does not turn a portrait image into a square or add space around the subject; use [Studio](/docs/edit/studio.md) to change the canvas or extend an image.

### Keep enhancement under control

A larger file can also contain changed detail. The upscaler's **Strength** sets how much enhancement is applied. With **Face enhancement** enabled, higher **Face creativity** can change a person's appearance. Start with Auto or restrained settings when preserving faces matters, then inspect the result before choosing stronger reconstruction. This is separate from **Scale**, which controls the output size.

### If a scale is unavailable

Wait for **Checking available scales…** to finish. The allowed factors depend on the selected source's dimensions, so switching to a larger source can reduce the available choices. If even **2x** exceeds the limit, download the image at its original size instead of trying a larger scale. If dimensions cannot be verified, remove the source and select it again or choose another image.

## Upscale a layer in Studio

1. In [Studio](/docs/edit/studio.md), select an image layer.
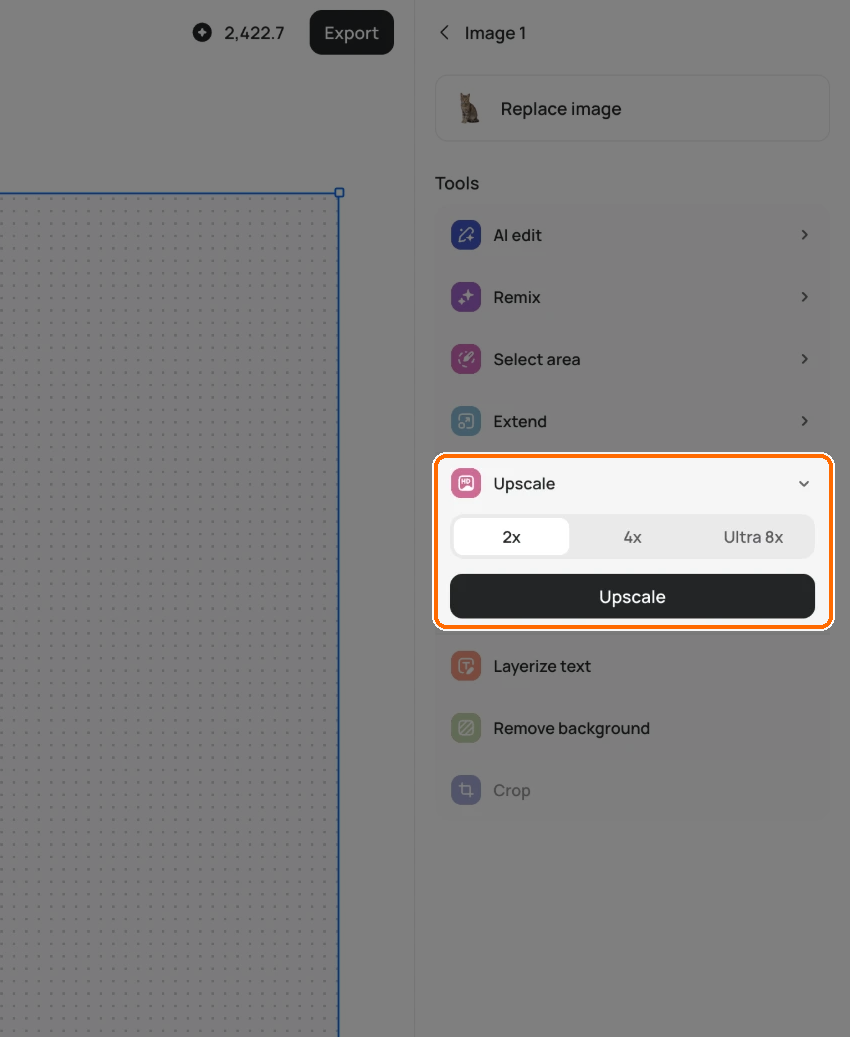
2. Under **Tools** in the right sidebar, choose **Upscale**.
3. Pick **2x**, **4x** or **Ultra 8x** (default 2x). Scales that exceed the supported output pixel count are greyed out.
4. Click **Upscale**.

   <figure><img src="https://1799634369-files.gitbook.io/~/files/v0/b/gitbook-x-prod.appspot.com/o/spaces%2FzjhNby3LLsIikYuvxAJP%2Fuploads%2Fgit-blob-0a5bd7178d5bda9458f8f87176ae58bf03e1f957%2Fupscale-5.png?alt=media" alt="Studio right sidebar for a selected image layer, with the Upscale tool highlighted and open on 2x, 4x and Ultra 8x above the Upscale button."><figcaption><p>Select a layer, open <strong>Upscale</strong>, pick a size and click <strong>Upscale</strong>.</p></figcaption></figure>

The layer changes in place, so you can keep editing at the larger size. This needs a paid plan.

## Upscale as you download

1. On an image page, click **Download**.
2. Under **Size**, pick a size tagged "(Upscale)". Sizes tagged "(Original size)" need no upscale.
3. The button changes to **Upscale & download** and shows the cost. Click it.

In Studio, click **Export** instead of **Download**.

If the button says **Subscribe to download**, that size needs a paid plan. For file types and the rest of the menu, see [Downloading images](/docs/organize-and-share/download.md).

## In this topic: product images

1. [Apps and Workflows](/docs/create/apps.md): choose the right app
2. [Remove Backgrounds and Objects](/docs/edit/remove-backgrounds-and-objects.md): cut out the product or clean up the photo
3. [Colorways](/docs/create/apps/colorways.md): show the product in new colors
4. [Material Swap](/docs/create/apps/material-swap.md): show it in new fabrics and finishes
5. **Upscale** (this page): enlarge it for print and store listings
6. [Ad Resizer](/docs/create/apps/ad-resizer.md): resize the finished ad for each placement
7. [Troubleshooting](/docs/help/troubleshooting.md): fix common problems